Drill Through is a Power BI tool allowing users to use visuals for in-depth analysis. However, there is currently no built-in function to disable this feature for specific visuals. This often leads to unwanted drill-throughs.
A common solution from the Power BI community is to duplicate the linking column used for a visual (link), thus avoiding the drill-through action. An alternate solution, discovered by @Alessandro, involves using a drill-through button. The user can still right-click a visual to drill through (and still select the wrong page), but now a button will also be involved.
The idea is to place a drill-through button on the page (we just need one button), and this button will dynamically bring you to the right page depending on what visual you’re selecting.

This solution uses the button’s conditional formatting feature. The button directs you to a specific page, depending on the visual you select. Here’s a simple step-by-step guide:
- Make a dummy table with a column that contains the names of your detail pages (used for drill-through).
- Add a button to the canvas and set its Action Type to Drill Through.
- For the button’s Destination, use conditional formatting and select the column with your page names from the dummy table.
- For each visual, under “Filters on this visual”, include the column with page names and select the pages to which the visual should drill.
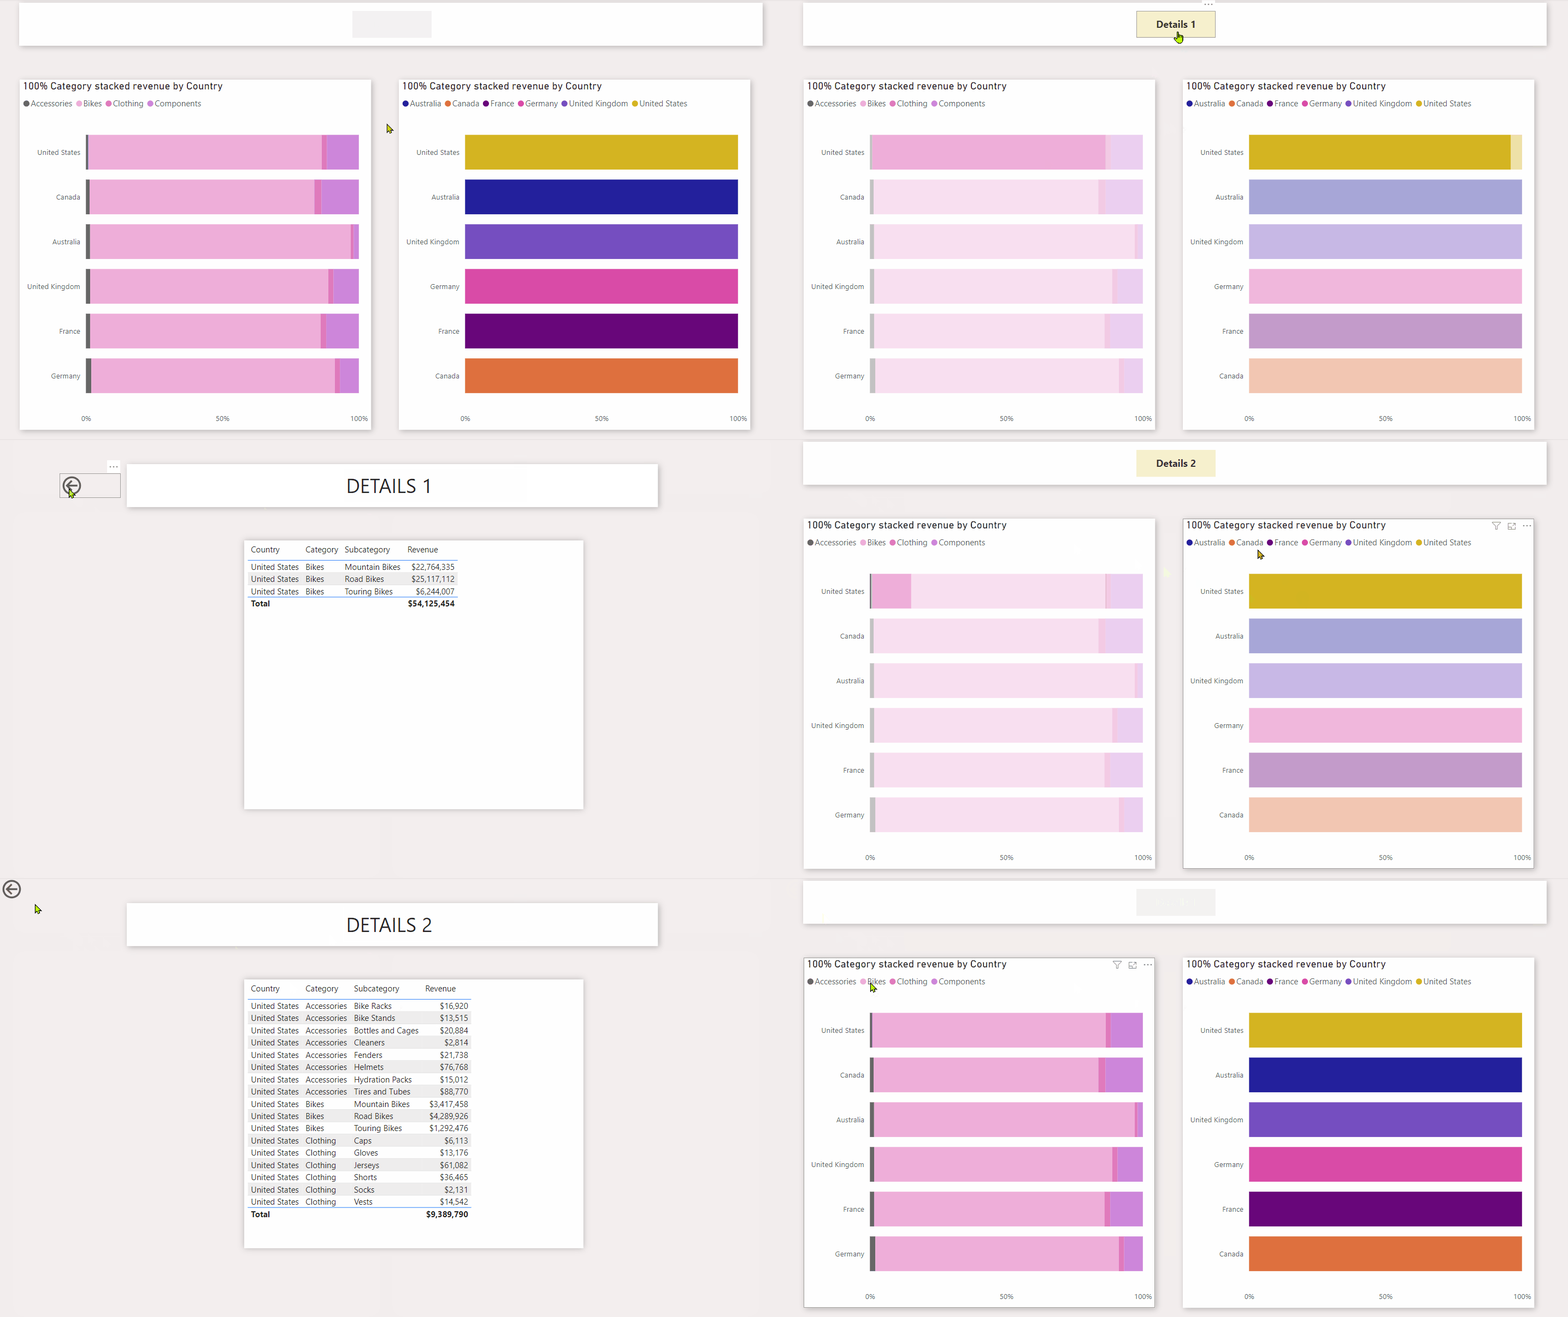
- Check the button’s function by selecting a value from a visual and see if the button redirects you correctly.
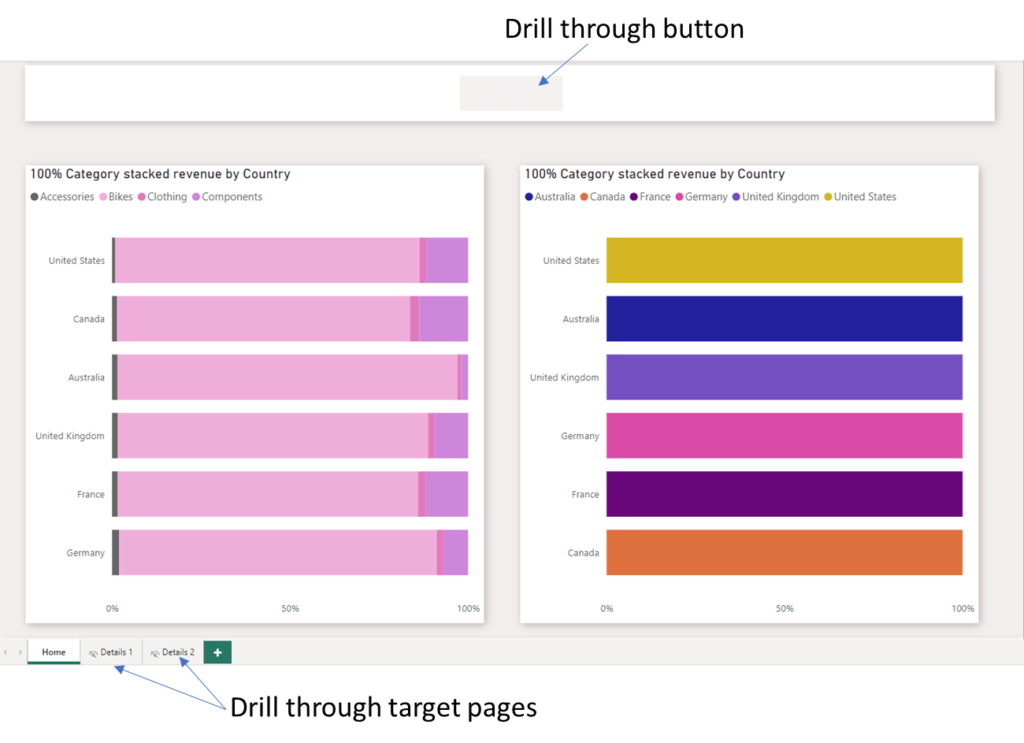
As an illustration, consider the Adventure works 2020 .pbix. This includes a home page with two visuals and two drill-through pages that use the same linking column, Country. Each visual should direct you to a different detail page, even if they both use the same linking column.

The detail pages are labeled “Details 1” and “Details 2”.

After creating a dummy table with these values, you can select conditional formatting for the button’s Destination and choose the “Pages Name” column.

Next, add a respective filter for each visual. For instance, one visual might lead to the “Details 2” page:

After setting all filters, you can customize the button’s appearance, like showing the target page when active, and hiding text when disabled. You can use conditional formatting to display the target page name correctly.


A big thank you to @Alessandro for this alternative solution. I hope it helps you, too! 🚀.


